
How to Grip a Handgun: Do’s and Don’ts
How to Grip a Handgun: Do’s and Don’ts
A critical part of gun safety is simply knowing how to properly hold your handgun.

If you’re reading this, you’ve likely taken the plunge and purchased your first handgun. As the name implies, your hands are going to be doing most of the heavy lifting when working with this platform, so it pays to know where to put them. Since each hand has 27 different joints, the placement combinations of fingers and the surrounding areas are endless. To that end, there are several ways to hold a gun during firing, each with varying degrees of effectiveness. Some hand placements can lead to poor accuracy or recoil control, while others can be downright dangerous.
Let’s start with some of the hazards associated with the two most common types of handguns. If life gets in the way and you need to finish this piece at another time, you’ll at least have the tools needed to use your new firearm without injuring yourself. As a general rule, you want to avoid any moving parts, regardless of whether you are holding a semi-automatic or revolver.
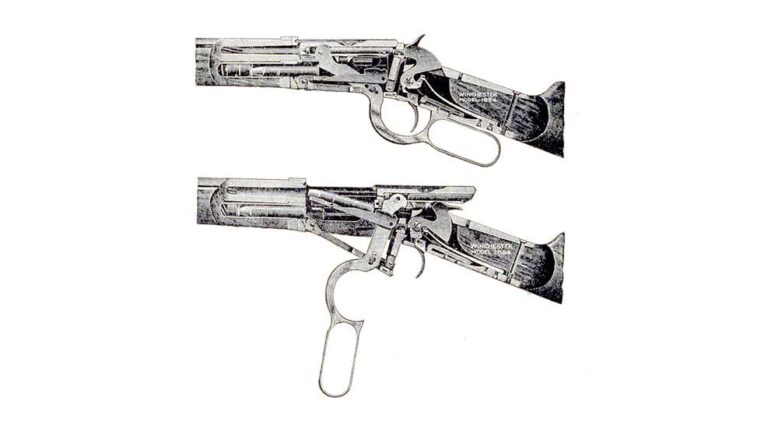
The easiest way to identify them is to first ensure that the gun is unloaded and then go through the motions for loading, dry-firing and unloading—without any ammunition present in the chamber, magazine or cylinder. With a semi-automatic, this will reveal the slide’s path of travel, hammer movement (if one is present), and any barrel tilting and locking up that happens before, during and after firing. Avoid resting any part of your hands or body in these areas, as they will get pinched or lacerated when the trigger is pressed, which powers their movement. 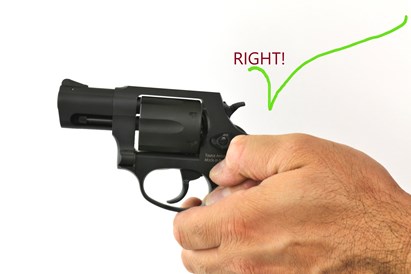
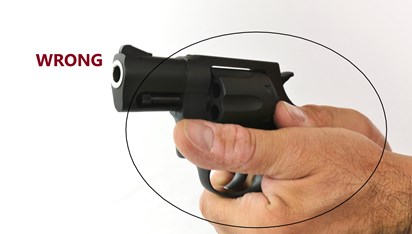
If you go through this process with a revolver, you’ll likely notice the cylinder rotates when the trigger is pressed or when the hammer is manually cocked. It’s important that you avoid contact not only with this part but the area directly in front of it, as high-pressure gas escapes from this area when fired. How high? Well, if it is chambered in a large enough caliber, enough to amputate a finger.
I’m sure the preceding was a bit scary to read, but knowledge is the apex predator of fear, this next section ought to assuage any trepidation you might have about hitting the range. Establishing a comfortable grip is easier than you might think, and once you place your hands correctly the first time, you’ll be able to repeat it without much thought the next time you pick up your gun.
If you’ve chosen a semi-automatic, keep in mind that the ultimate goal is to have as much of your hand up as high as possible. Typically, there is a bump at the top of the backstrap, separating the frame from the slide. You want to get the web of your firing hand right up against it but not past it, as it would then be in the path of the slide.
A good way to safely find your limit is to try this with the slide locked to the rear. This will illuminate the danger zones rather clearly. From here, you want to plant your thumb and trigger finger above the trigger guard and begin rolling your fingers along the grip, again as high up as possible. Ideally, the top of your middle finger should be touching the bottom of the trigger guard. Next, it’s time to add your non-firing hand with one golden rule: thumb forward. In my experience, the only way I’ve seen somebody severely injure themselves with a firearm’s mechanism is when they attempt to wrap their support hand thumb around the back of a semi-automatic pistol. Under no circumstances should this ever be done. 
Instead, place your support thumb just below your firing hand thumb, with both pointing straight at your target. Lastly, place your remaining fingers on each side or over your support hand as high as possible. In a perfect world, the top of your index finger should be touching the outer edge of the trigger guard, just as the middle finger of your shooting hand does.
In many ways, the grip on a wheelgun is very similar to that of a semi-auto. However, thumb placement is nearly 180. Place your support hand in the same manner as previously described, but perhaps a little lower if your gun’s grip is aggressively rounded toward the top. This will mitigate slippage under recoil. Wrap your support hand around your shooting hand in the same manner, and then, instead of placing your thumbs forward, use your support hand thumb to hold your shooting hand thumb down and away from the cylinder. An alternate support thumb placement is resting it on the area behind your firing thumb. This is certainly effective, but I hesitate to teach it to somebody who also likes to shoot semi-autos, as this will almost certainly lead to injury should they build revolver habits and forget what they are holding.
 With a little bit of practice at home, you should be able to comfortably hold either type of handgun with a high degree of comfort and place your first shots successfully downrange. If you’re coming to this piece after your first range trip, you’ll notice that recoil will be greatly diminished by following what you read here. Overall, go slowly, observe each part of your hand before pressing off each shot, and enjoy building the fundamentals of marksmanship in a completely pain-free setting.